Alameda Thrift Haul

Evan and I have a routine most Saturdays that starts with coffee and is followed by a trip to Alameda to do some thrifting. Our favorite place to go is Redux. It's an amazing little shop that is also part art gallery and has incredible salvaged items for insane prices (as seen below...). Today's trip was a grand success; we bought plenty of goods for the house and kept the cost under $50. Here's what we got!

6-pack Mushroom shooters for $2

6-pack Mushroom shooters for $2

splattered mixing bowls for $5.50/each

splattered mixing bowls for $5.50/each

condiment set for $2

condiment set for $2

embroidered kitchen towels for $2/each

embroidered kitchen towels for $2/each

retro "Cooling Dishes" cookbook for $2

retro "Cooling Dishes" cookbook for $2

pyrex dish with brass stand for $5.50

pyrex dish with brass stand for $5.50

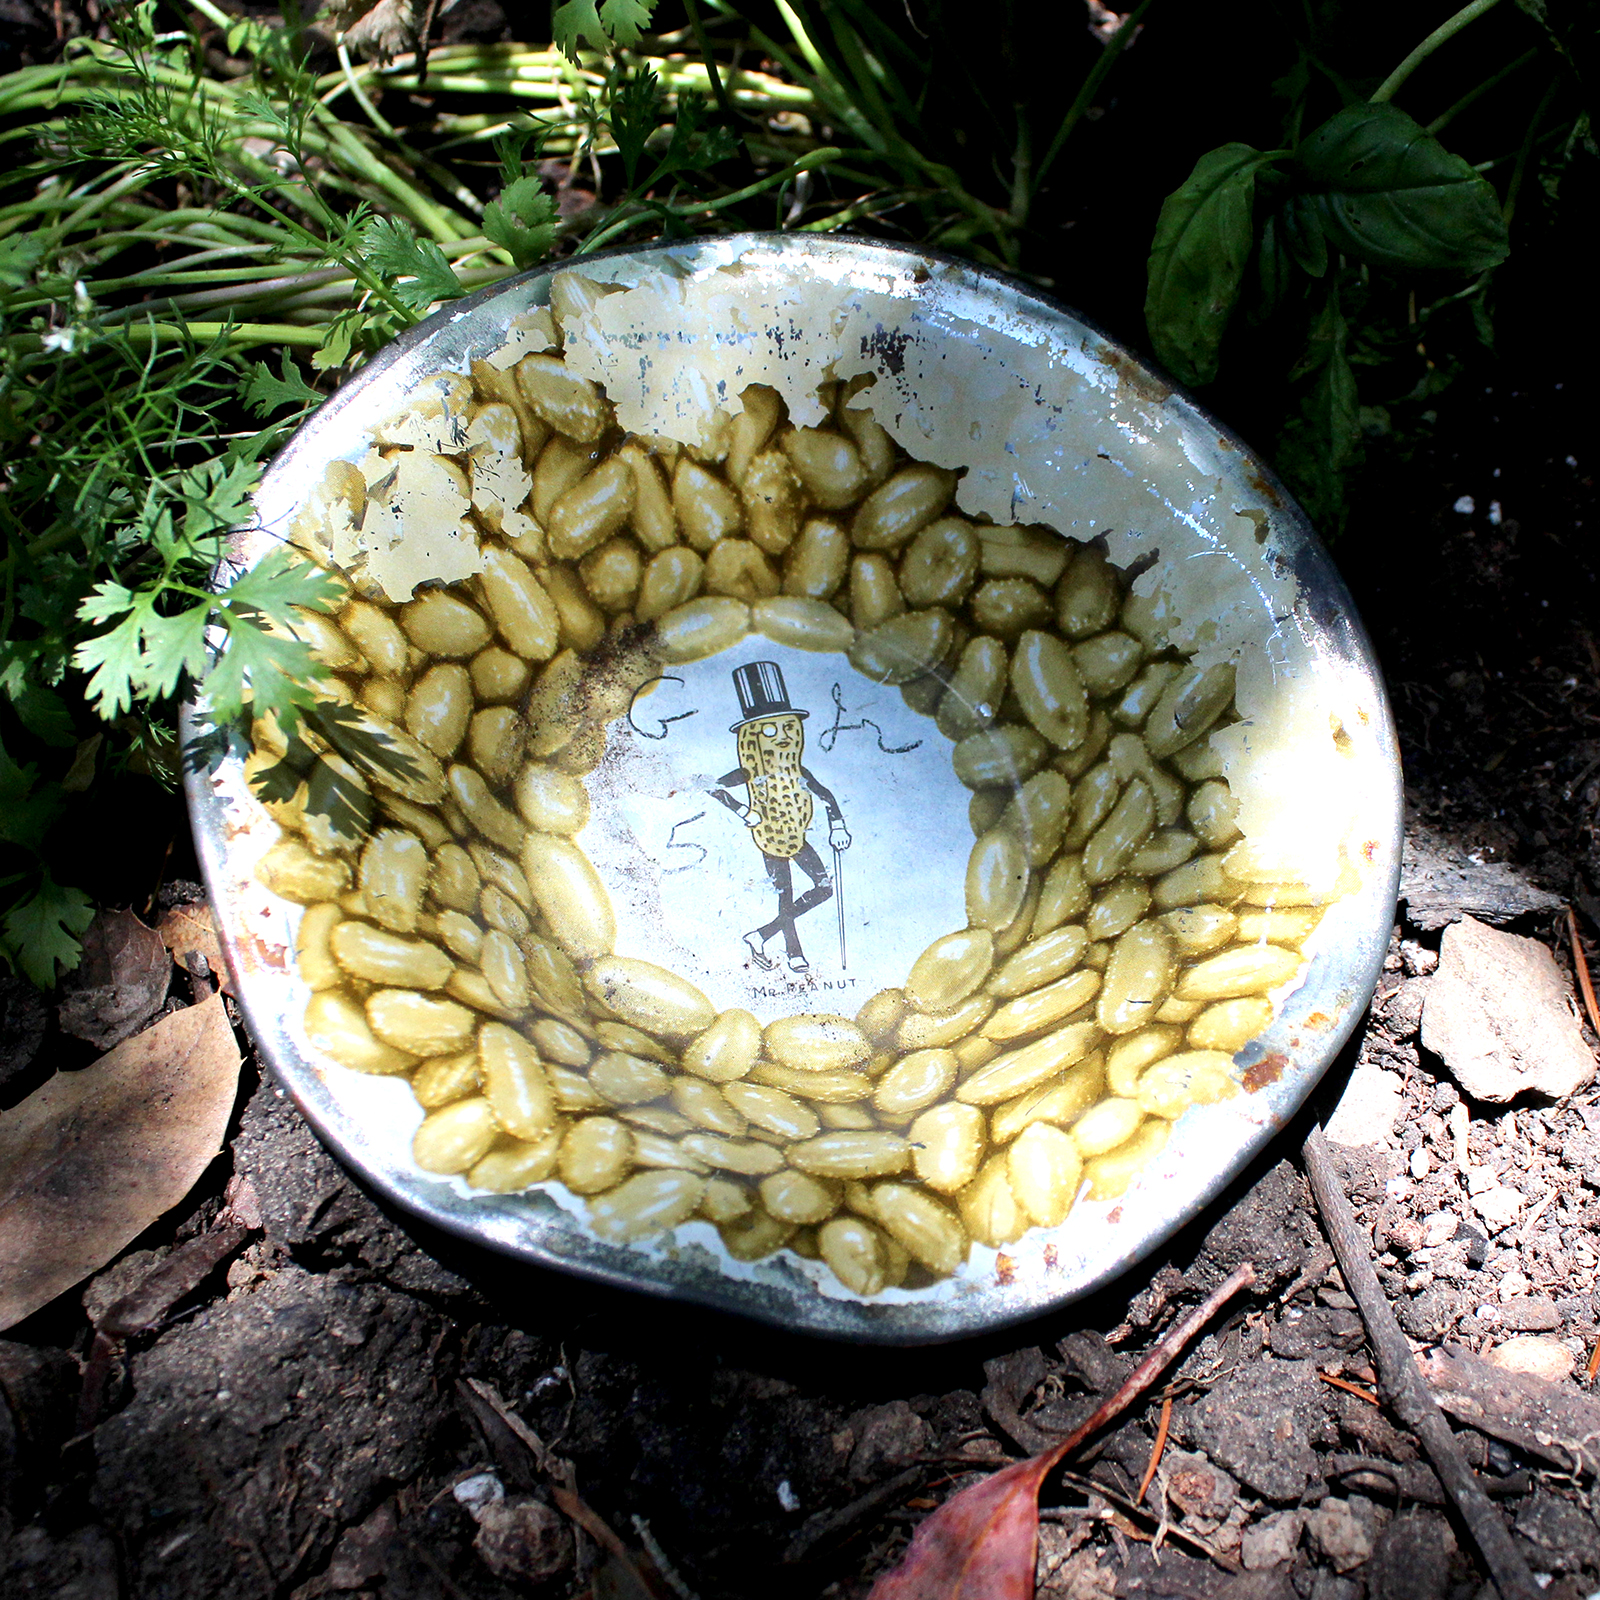
not even sure what this Planter's Peanuts dish is for but it is awesome and cost $1

not even sure what this Planter's Peanuts dish is for but it is awesome and cost $1

(maybe) Moorish brass pitcher ($5) and vase ($4)

(maybe) Moorish brass pitcher ($5) and vase ($4)

cast iron candle holders for $3/each

cast iron candle holders for $3/each

Welding a modern chandelier for the M Bedroom

The master bedroom has a comically small light fixture. 

image.jpg

When looking at chandeliers, I came across this light, which I thought would look good in the long master bedroom.

image.jpg

It was on Craigslist for $500 NIB from Restoration Hardware. Uhh no. I have a welder and know how to wire a lamp. It's on! 

Made some designs. 

Made some designs. 

Got some 1/2" square tube. 

Got some 1/2" square tube. 

I decided I wanted it to be 18"x4' for some reason. 4' long and 4' tall seemed the right max size for the room. 18x48 inches would be 1.5'x4 or 3:8 ratio. Is that a good aesthetic ratio? We'll see:

Laying out. 

Laying out. 

Nice ratio

Nice ratio

image.jpg
This is a bad weld. It's sitting on top. You want better penetration.

This is a bad weld. It's sitting on top. You want better penetration.


I am NOT a good welder. But that's what the grinder is for. 

You can see the line between the pieces where the weld can break again

You can see the line between the pieces where the weld can break again

Here's my lil welder setup. It's a Lincoln 125A "pro-sumer" welder with .035 flux core and the option to add gas. Mask is auto darkening from Harbor Freight. $40 but soo cool. 

Here's my lil welder setup. It's a Lincoln 125A "pro-sumer" welder with .035 flux core and the option to add gas. Mask is auto darkening from Harbor Freight. $40 but soo cool. 

Even with my little easy welder, it's still hard to get it a good weld. The two knobs are simply amps and wire speed. There's a chart under the side flap of the welder that tells you what settings to use. It says flux core .035 should be set to current B and wire speed 1. That's low current and slow wire speed. You want the current and speed settings so that it makes a bead that melts into the metal a bit. 

It's been a lot of trial and error, mainly due to crappy welds - they have to be ground down and then some crack and have to be re-welded and re-ground etc.  

I want to hide the wire in the fixture. It's going to be hard to fish it through  

I want to hide the wire in the fixture. It's going to be hard to fish it through  

This galvanized eyelet fit into the steel tubing nicely

This galvanized eyelet fit into the steel tubing nicely

It's taking shape

It's taking shape

It's pretty difficult to drill this material so I marked out the holes with a utility knife buy scratching an X so that the countersink bit would have something to sit into and start in the right place.

It's pretty difficult to drill this material so I marked out the holes with a utility knife buy scratching an X so that the countersink bit would have something to sit into and start in the right place.

I added some decorative wires to echo the shape of the ceiling  

I added some decorative wires to echo the shape of the ceiling  

It's coming along but certainly not going easy. It's been pretty hard to thread the holes for the "lamp nipples" with a tap (tapered thread cutter). Fortunately none of this needs to be super strong. 

I started trying to fish the "lamp cord" 16-2 wire through. I thought it would simply want to bend and turn the corner if I pushed it but it was too limp. Then I tried to push bailing wire through the same way but it also was too limp. Christina suggested I get some pull chain because it would feed by gravity. She was right.

I got several feet of heavy pull chain and put the fixture at a 45 degree angle to gravity feed the chain down. Once I got the chain down, I tied the baling wire to it and pulled that through

I got several feet of heavy pull chain and put the fixture at a 45 degree angle to gravity feed the chain down. Once I got the chain down, I tied the baling wire to it and pulled that through

Now that I have the baling wire through, I need to get the lamp cord through. 

Taping the lamp cord to the bailing wire. First try

Taping the lamp cord to the bailing wire. First try

First try taping the bailing wire to the lamp cord was a failure. I had to start back with the pull chain.

Second try with a lot more tape

Second try with a lot more tape

Second try was a success! 

image.jpg
image.jpg
image.jpg
image.jpg

Original Deco Moderne Apartment / Hints about the Master Bath history

Since I've been trying to parse out the history of our house, I thought I would show you an apartment building I saw in Oakland that is very original.

Our house was built in '27, but had a major addition in '39, some work in '47 (sink date) to the 50s, and some linoleum added to the kitchen in the '60s.  

Houses built during certain time periods remain remarkably consistent with the style of the day. It's only somewhat recently that we have favored old styles over new. For example, an original Craftsman house from '10s-'20s would often have "subway" 3x6" wall tiles and 1" hexagon floor tiles. From the '30s-'50s, Dal-Tile 4&1/4" square tiles would be the most common, all over the place, as in this apartment building.

Above you can see how I determined this is a '40s apartment building. Likely late '40s, as WWII ended in '45 and a lot of apartment buildings were built for the post war population boom. Edit: I checked and it was built 1940

Above the late 40s sink, surrounded by Dal-Tile counter top. Tile was most common countertop until '50s/'60s, when linoleum was used with undermount white cast iron sinks, like the kind currently being pulled out of my kitchen.

Hopefully you can see why I think my master bath was done in '39. 

Here's the summary: 

-My sink is pre-war Crane Drexel. Major additions were done in '39 so I would guess the sink is from '39 or '40. 

-The master bath was originally a changing room. That's why it has a closet and a redwood vanity desk. That is a very old fashioned feature more in line with the Victorian era of body shame 

-the shower is white square tiles (fits with '39). The trim is like the kind in the '50s bath above, probably popular from the '30s-'50s as it has a hint of Deco style.

-the floor has no hint of tile, just linoleum, which means the floor was originally redwood (probably) like the rest of the house, then at some point, probably in the '60s they added linoleum and mosaic tile in the shower pan.

-the mosaic tile in the shower pan is super '60s. No doubt about it. Blue and green, under 1" squares and rectangles in "random" pattern. 

Redwood make-up vanity desk. Relic of first use - dressing room

Redwood make-up vanity desk. Relic of first use - dressing room

'60s mosaic shower pan floor

'60s mosaic shower pan floor

Shower trim and tile looks '40

Shower trim and tile looks '40

The knobs on this Crane Drexel means pre-war. The '39 addition was finished around '40.

The knobs on this Crane Drexel means pre-war. The '39 addition was finished around '40.

Looks '40 to me

Looks '40 to me

Got the Gothic lights working

After installing the lights, I wasn't getting them to turn on. First thing to check with my beeper (electricity detector)  was power to the switch box. I wasn't getting anything from the switch boxes so I checked the fuses to see if there are any burnt ones. So I decided I should tie into the power going to the other switches by the front door. I used a piece of spare wire, held by my wire strippers (with insulated handles) to jump power from the hot light switch to the living room 3 way. I touched it to one pole on the 3 way and the light lit up! Nice! Then I connected it to the other pole and POP! Blew a fuse. The reason for this is there actually was power to the box but I just have a crappy beeper. Connecting a 110v hot to another 110v hot makes 220v.

Even for people like me who are pretty good with 3 ways, it helps to make notes. The old knob and two wires were not labeled so I had to figure out which was which.

Now I know that B wire is hot in (supposed to be black), C goes to the light somehow and when B is switched to A (common), it goes to the other switch (beeped for hot over there). Since there are only three wires, I know that if the hot comes in her…

Now I know that B wire is hot in (supposed to be black), C goes to the light somehow and when B is switched to A (common), it goes to the other switch (beeped for hot over there). Since there are only three wires, I know that if the hot comes in here, the other switch box must be connected to the lights

I started labeling the wires with tape. A legit electrician would use different colored electrical tape to mark them. I started sketching it out:

image.jpg